
See the end of the post for a video!
A friend of mine was married last year on the 12/12/12 so I'm making this project to give to her for her first anniversary.

Let's get started...
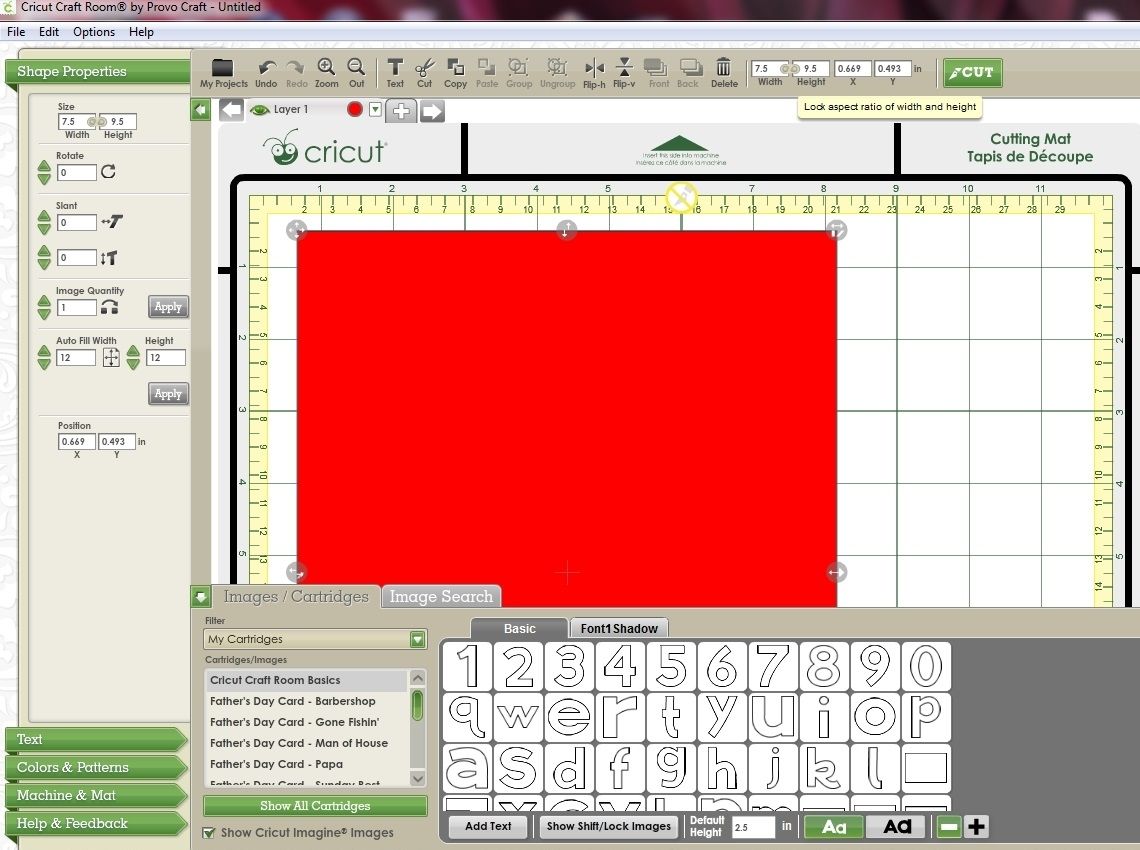
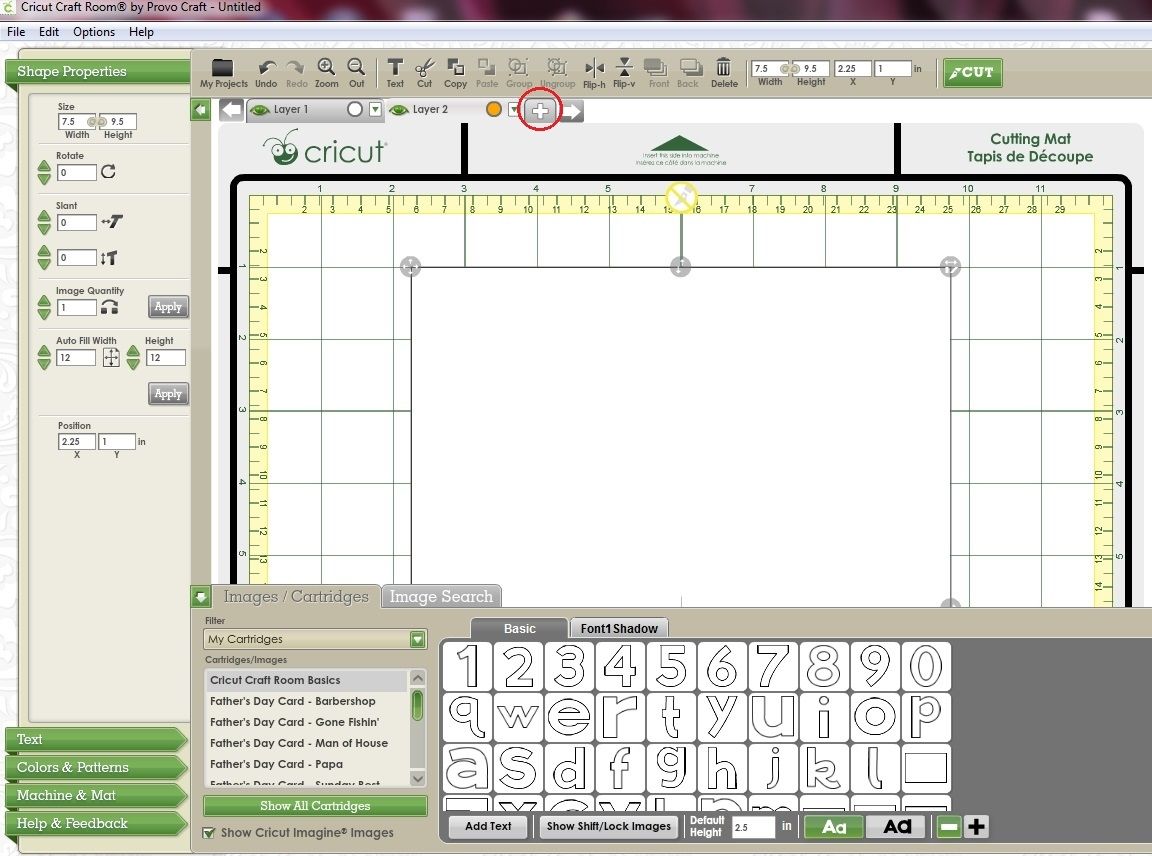
The first thing I do is place a rectangle on my mat to use as a guide for placing my images. The rectangle is the same size as the inside of my picture frame. My frame is 8" x 10" but the inside measurement is 7'5" x 9.5" so that's the size I use.
I used one of the rectangles from Cricut Craft Room Basics.
- Place the rectangle on your mat and click on the Lock Aspect Ratio toolbar button to turn it off. (It will turn grey.)
- Then using the Width & Height boxes on the toolbar resize it to 7.5" x 9.5".
To make it easier to see my other objects I'll turn the preview colour of this layer white.
- Click the preview colour button on this layers tab (in this case it's the red dot) then click the white circle from the Basic Colors palette. Press Apply to accept that change.
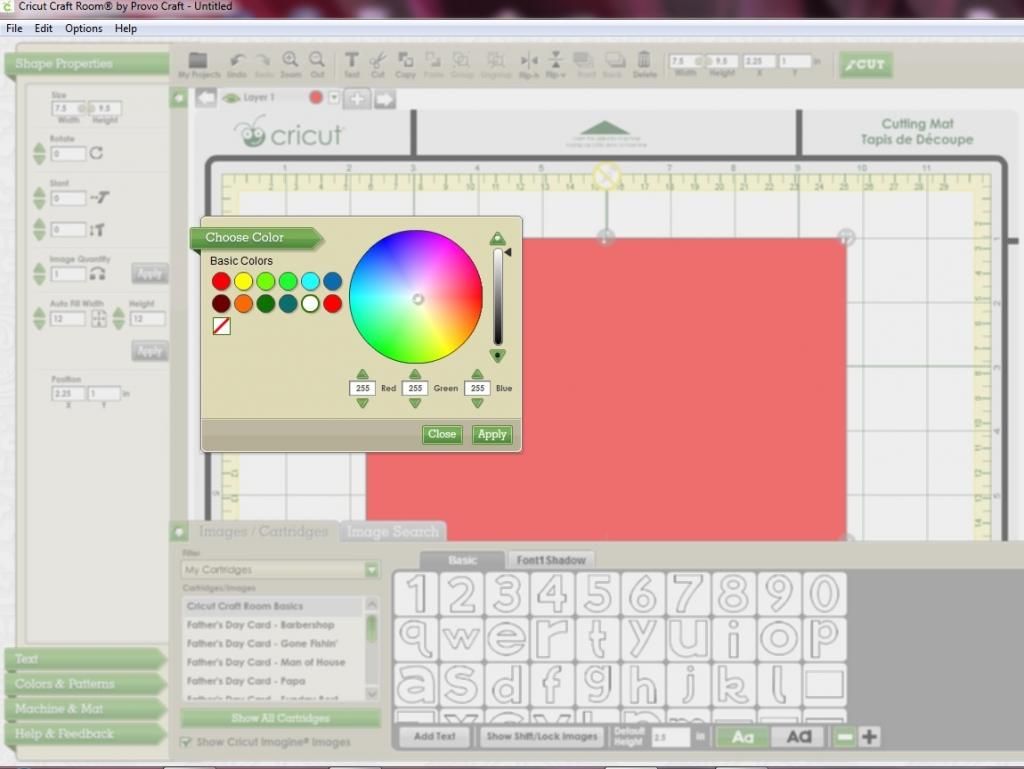
- To help me centre my text I'll move my rectangle over so that it is centred on the 6" mark.
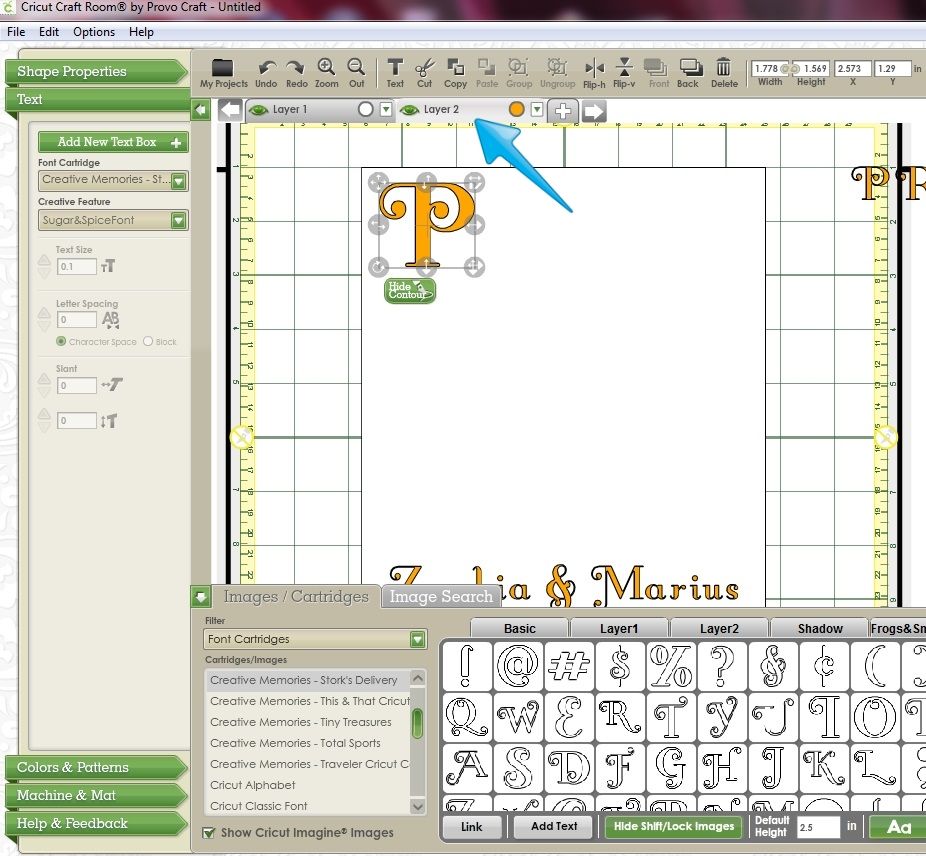
- Add a new layer to your project by clicking on the plus button next to the Layer 1 tab.
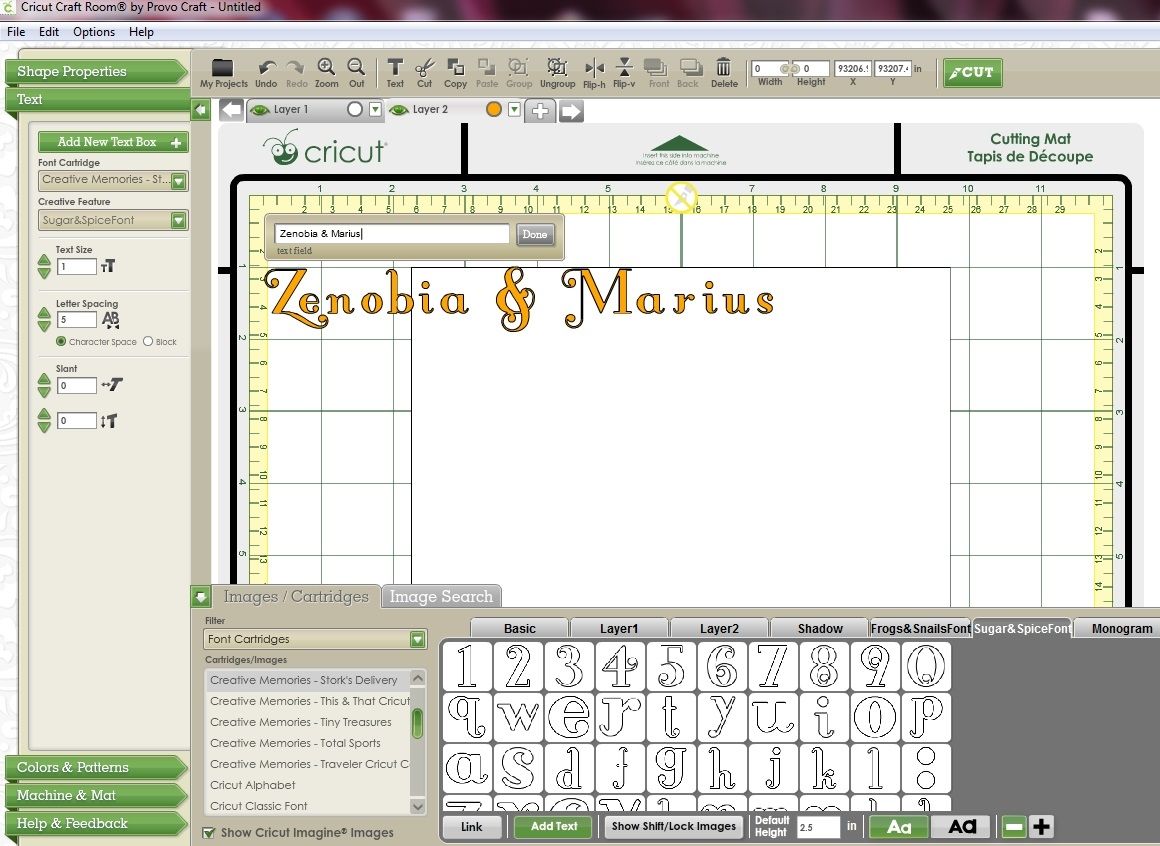
Now we'll start to add our text.
- Make sure the 2nd layer is selected. (Its tab will be light grey.)
- Click on the Text menu
- Click the Add New Text Box button

- Select your font from the Font Cartridge menu. I'm using the Creative Memories Storks Delivery cartridge.
- Select which creative feature you wish to use. I'm using the Sugar & Spice Font.
- Select your text size. (You can change that later too.) Mine is set to 1".
- Type in your text. I'm typing in my friends Christian names.
- You can change the spacing between the letters by clicking on the arrows next to the Letter Spacing option in the Text menu
- Press the Done button when you're finished.
- Next, add another text box (move it away from the first text box by clicking anywhere on the grey area around the box) and type the date. I like the term "established" so I'll be typing Est. 12.12.12. Press Done when you're finished.

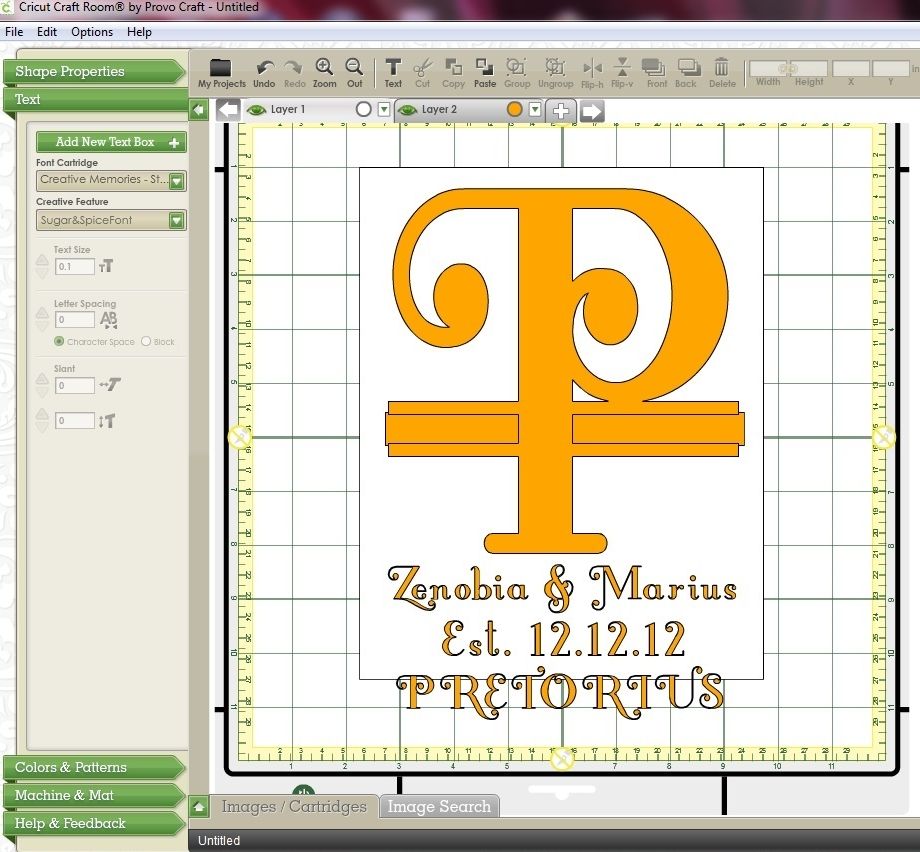
- Add another text box and type in the surname. This is the text that will be inserted across the monogram when it is split.
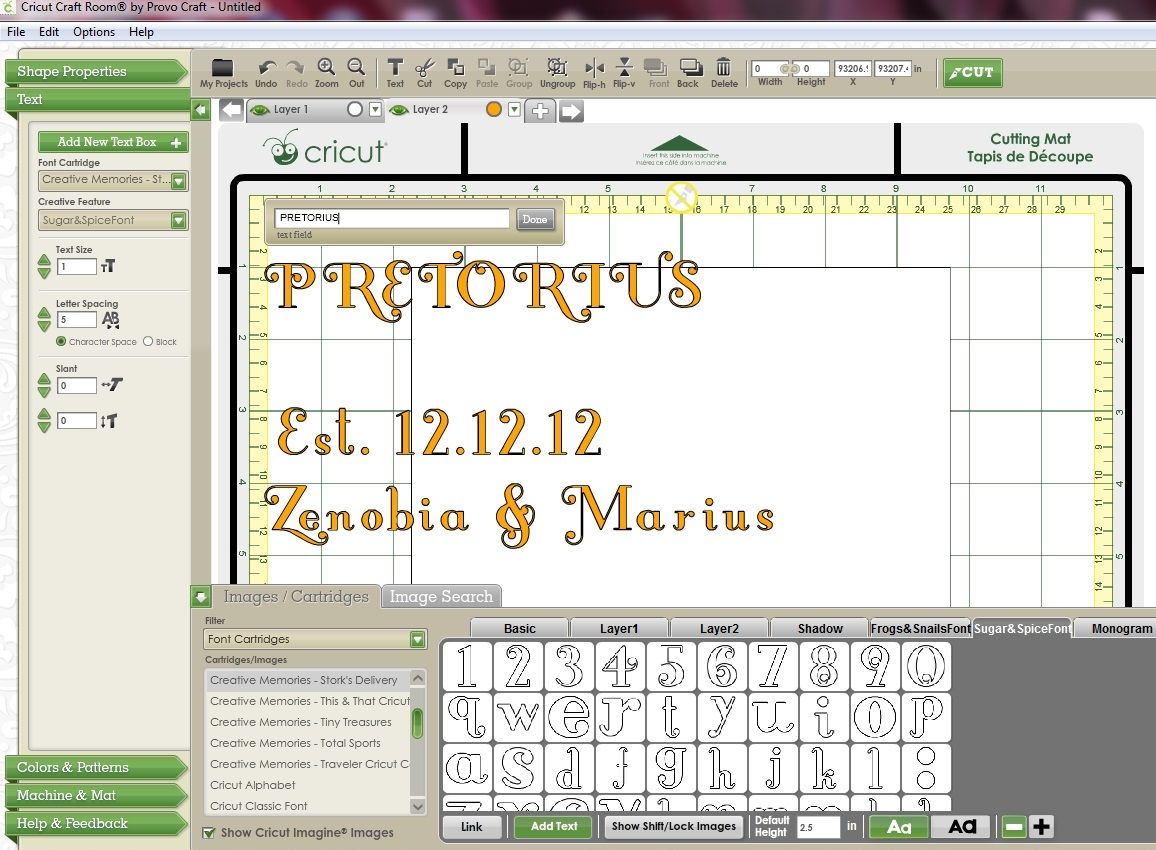
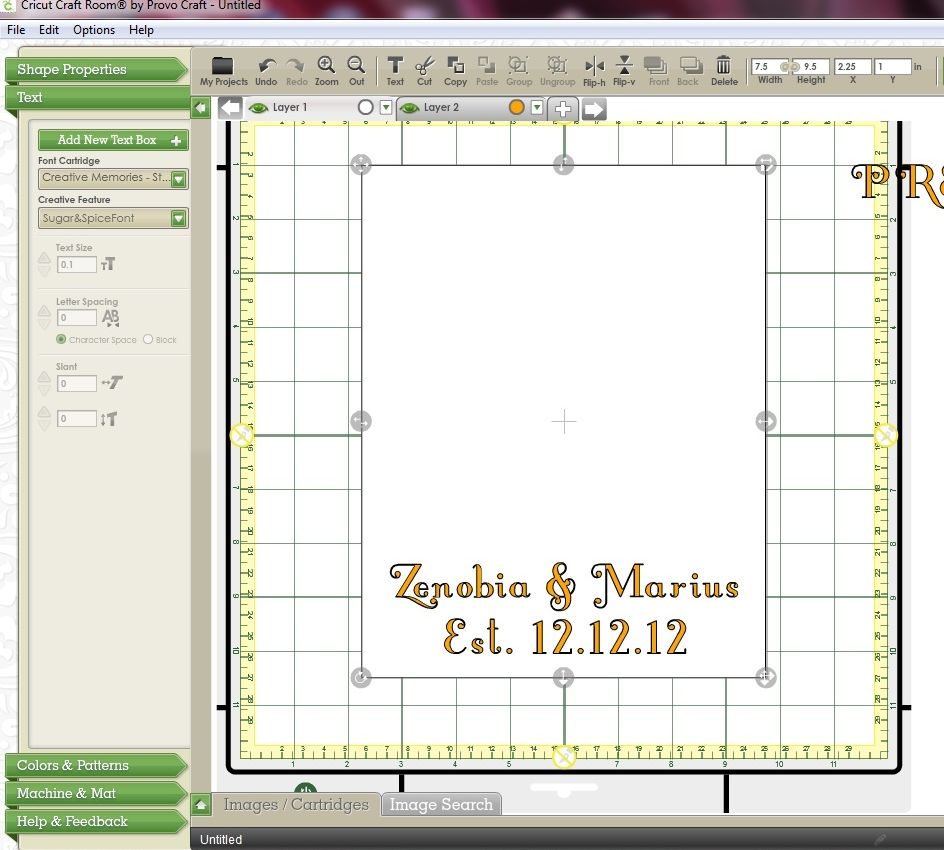
- Move the surname off to the side then position the Christian names and date at the bottom of the large white rectangle. It's best to get your centering done now as you'll be able to lay down all the text onto your glass at the same time.
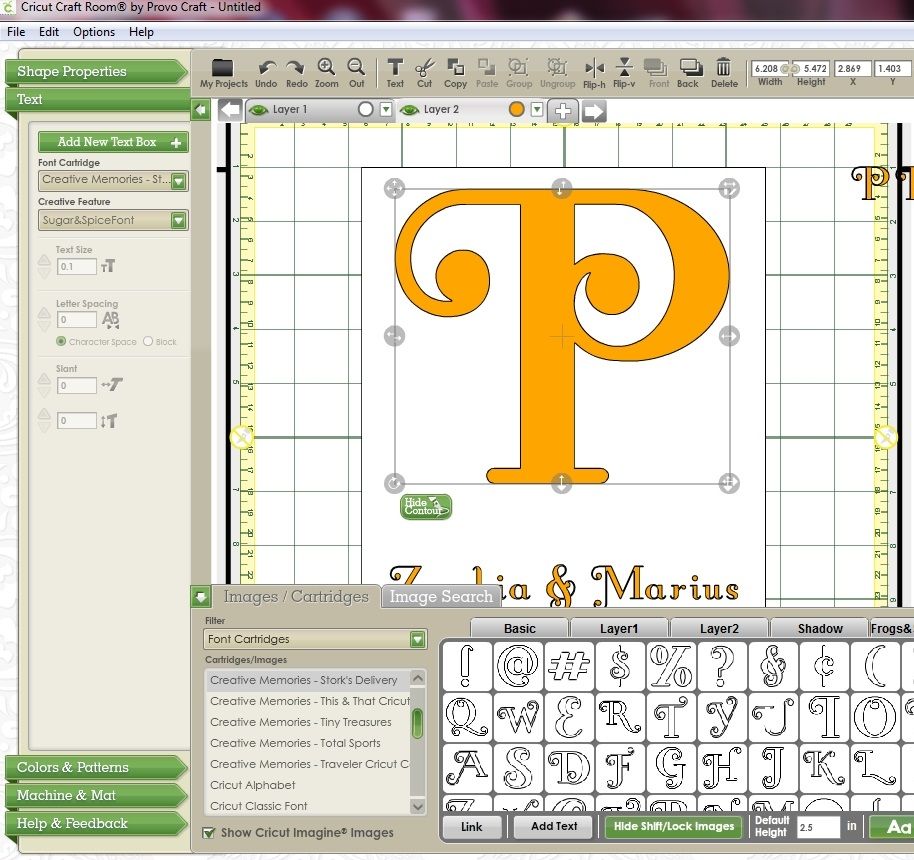
The next step is to create the monogram letter. Again I'm using the Sugar and Spice font from the CM Storks Delivery cartridge.
- Select your letter of choice and drag it to the mat. You'll notice that in the picture below my letter is white. That's because at some point I selected the large white rectangle which made that layer active.

- To remedy that I delete the letter I placed on the wrong layer, click on the tab for Layer 2 then add my letter again. This time it's yellow which indicates it's on the correct layer.
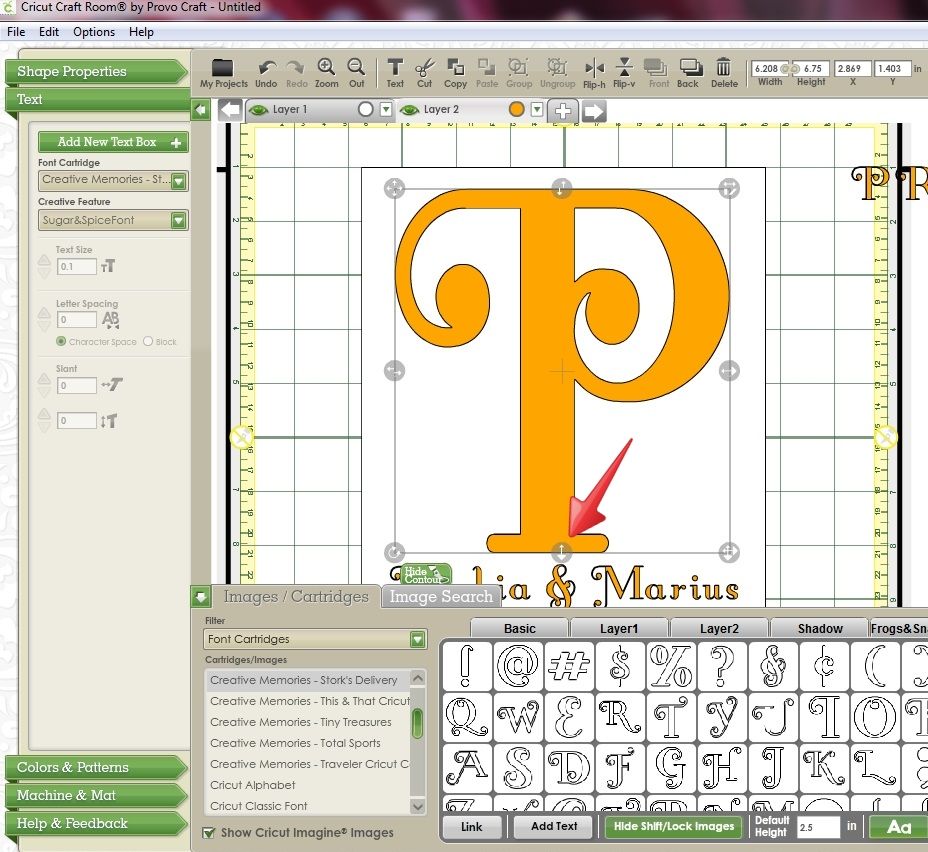
- Using the bottom right handle resize the letter to fit inside the white rectangle. I made my letter approx 6" wide.
- I wanted the letter to be longer so I used the bottom centre handle and stretched it to fit.
Now we need to split that letter. We'll use rectangles from the Cricut Craft Room basics cartridge.
- Select the Cricut Craft Room cartridge from the cartridge filter and drag one of the rectangles to the mat. Make sure you're still on Layer 2.
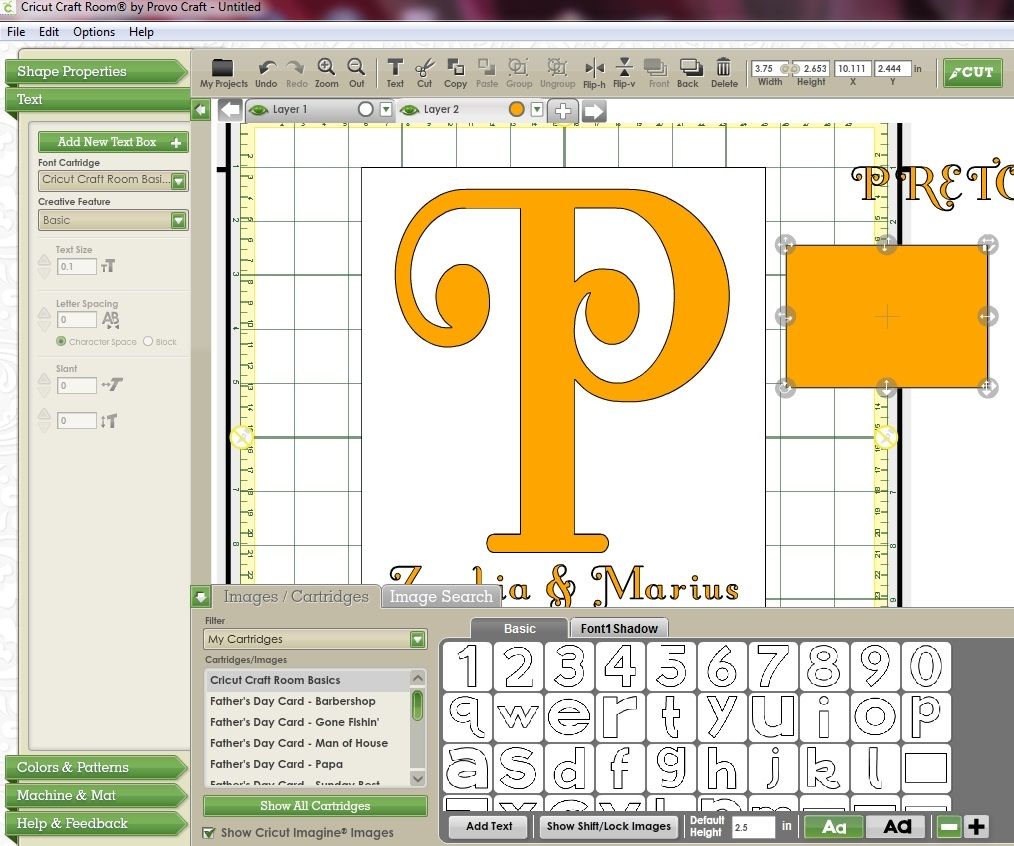
- Resize that rectangle. Using the Width & Height boxes on the toolbar I resized mine to 6.5" wide (to give me .5" on either side) and .25" in height. Don't forget to make sure the Aspect Ratio button is still off.
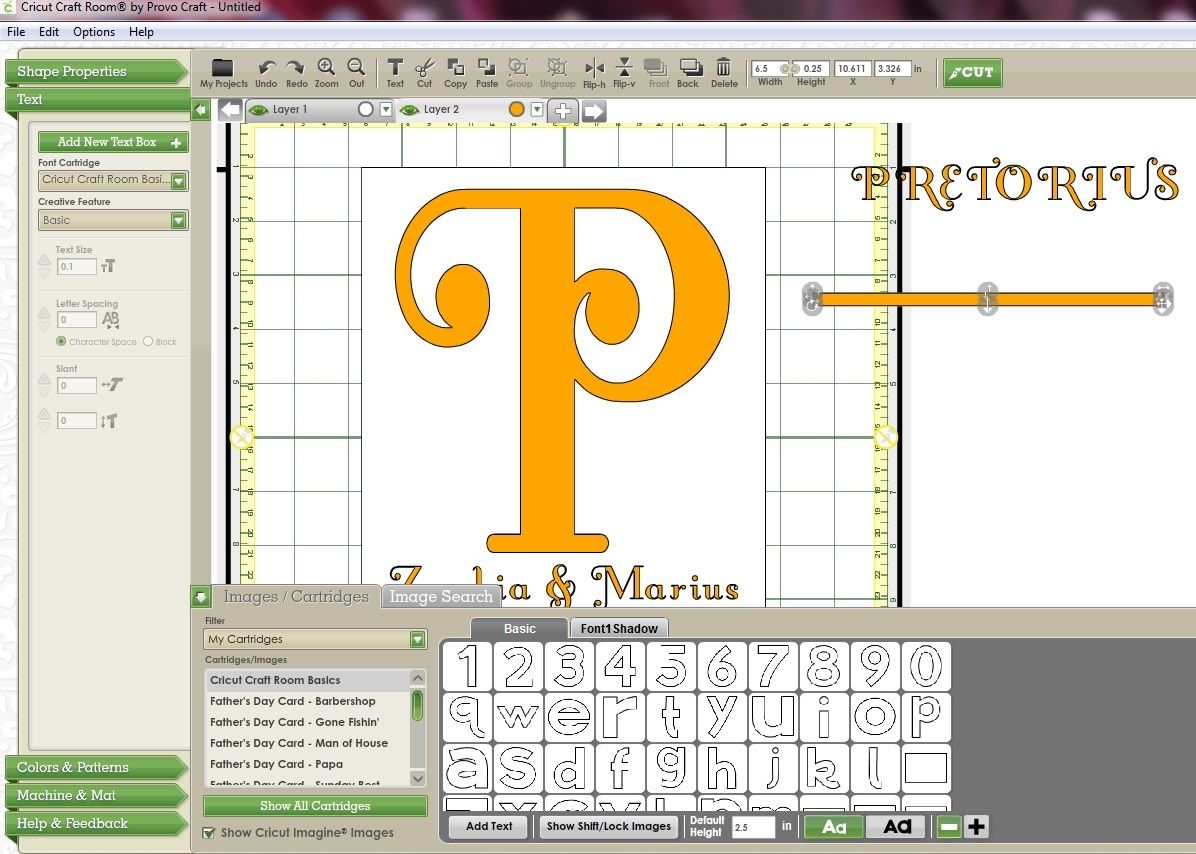
- Copy that rectangle to the clipboard (Ctrl C) then paste it onto the mat twice. (Ctrl V). You'll now have 3 small rectangles.
- Move the bottom rectangle away to be used later.
- Select the other two rectangles by dragging your mouse around them
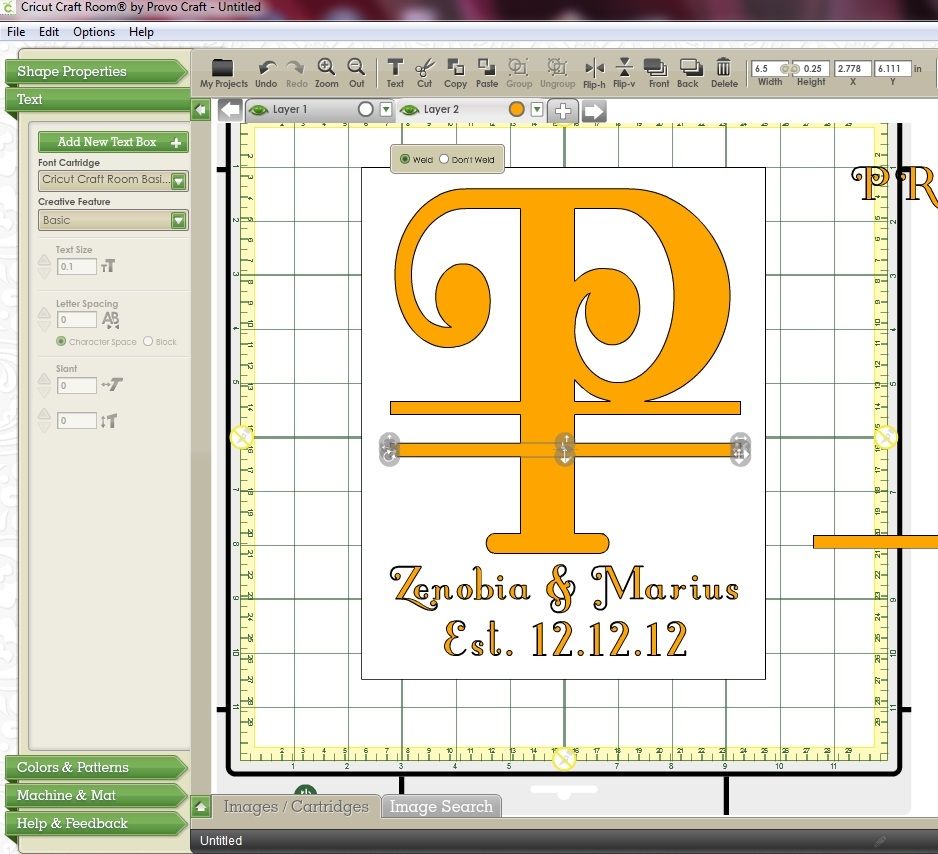
- Move the two rectangles over and place them on top of your monogram letter. I placed the top rectangle so it just touched the bottom of the curve in the letter P. Place them where ever you think will look best.
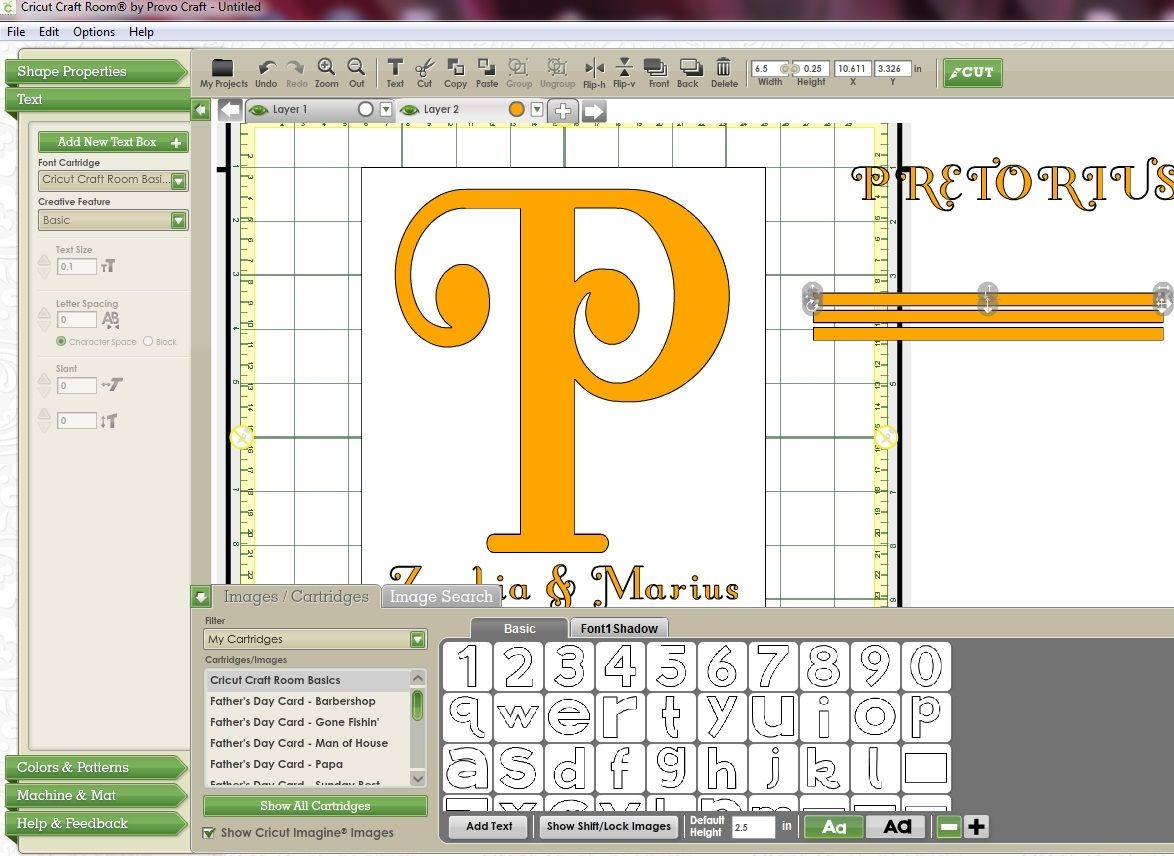
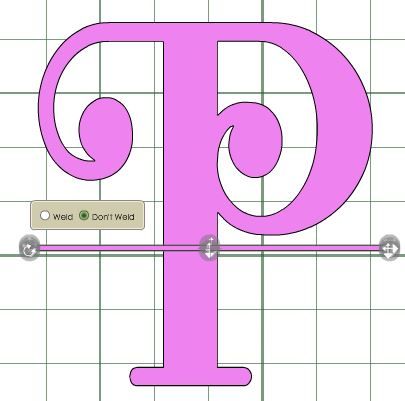
- When you move the rectangles onto the monogram they will be automatically welded. (Look for the Weld/Don't Weld button.) Ensure that you keep these two rectangles and the monogram letter welded.
- Select the second of the two rectangles and move it down. This will form the bottom half of your split letter.
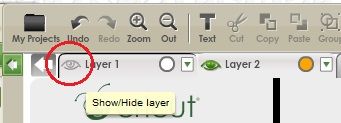
If you have trouble selecting any of the objects on layer two turn off the preview for layer 1 by clicking on the Show/Hide Layer button on the Layer 1 tab so the eye turn grey. (Now that you have everything pretty much lined up you won't be needing that white rectangle.)
- Now take the third rectangle and stretch it so it is slightly wider than the other two. Then adjust the height so it's approx .65".
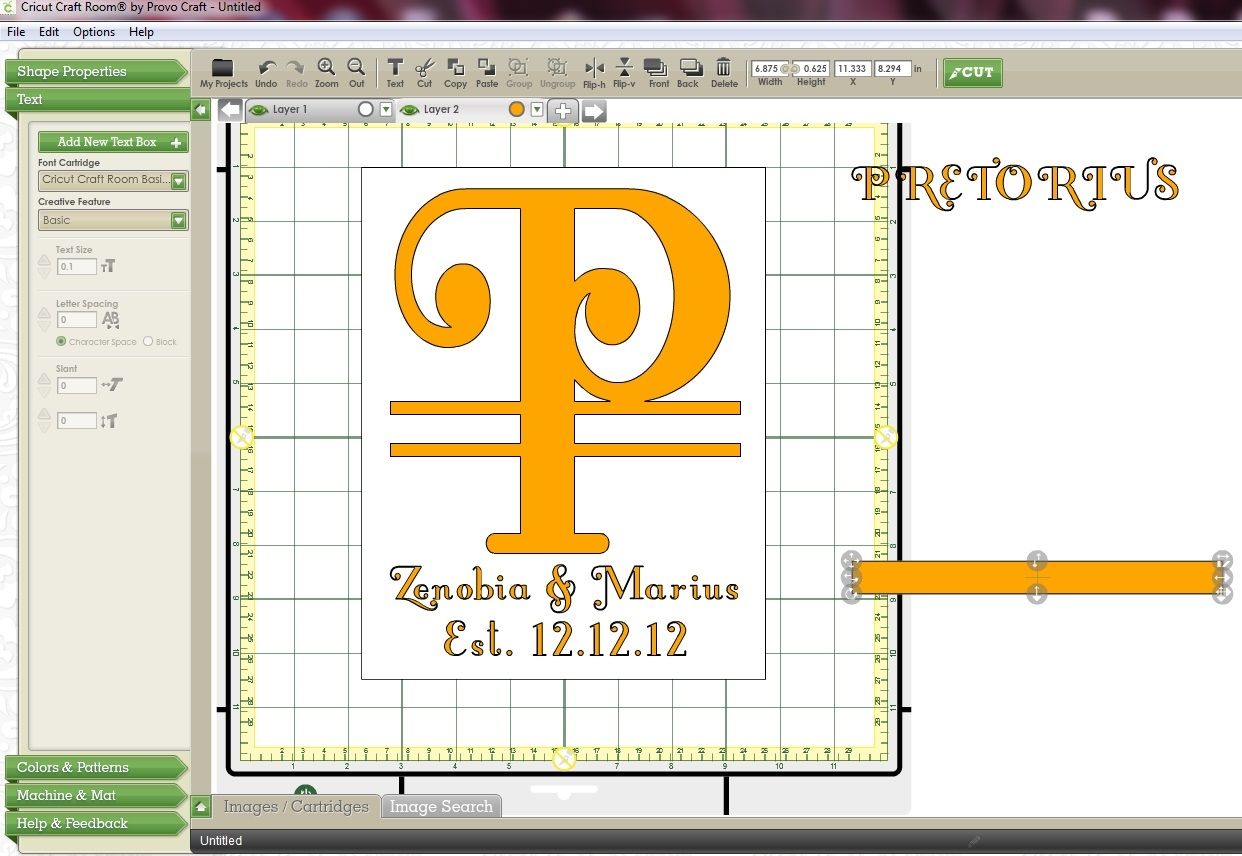
- Move the third rectangle over and insert it in between the other two rectangles. The middle rectangle should slightly overlap the other two rectangles. You may need to move the bottom rectangle up or down slightly.
- This time click on the Don't Weld button. That means that this rectangle will actually cut separately to the rest of the images on this layer.
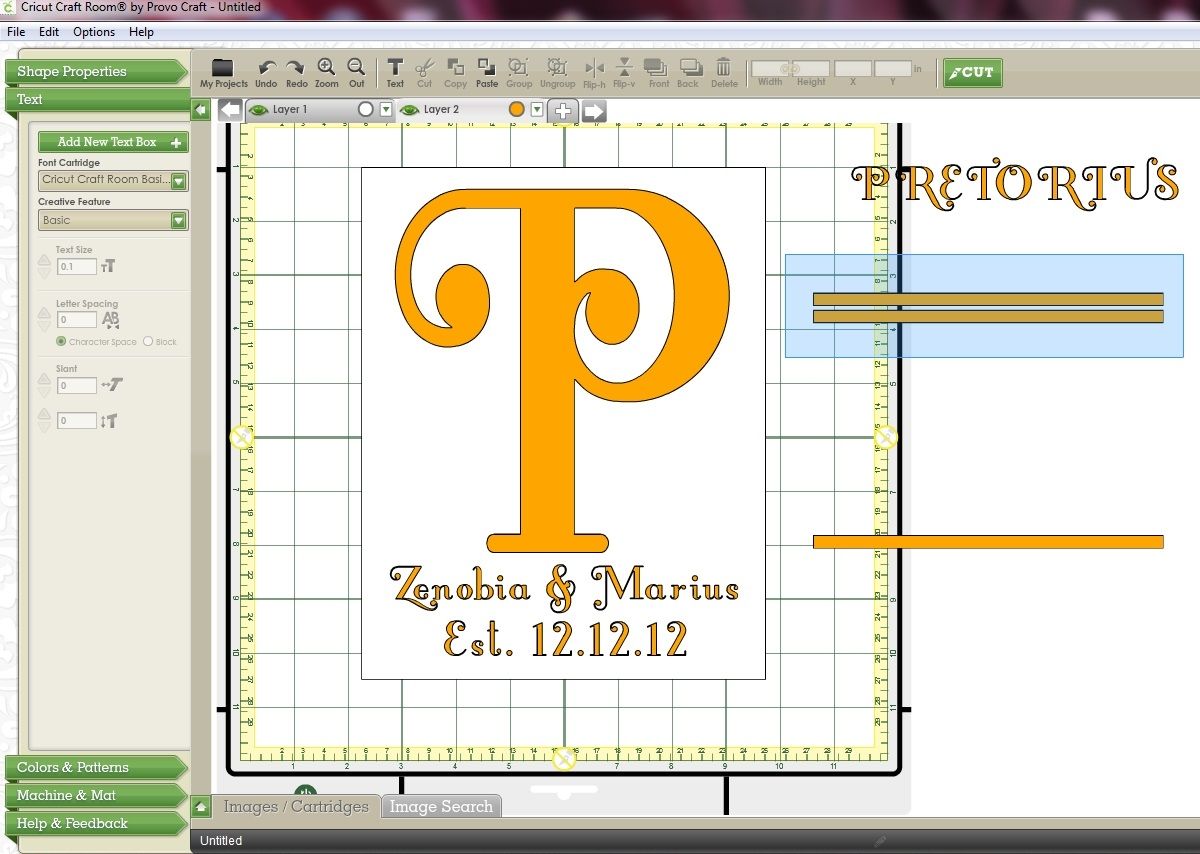
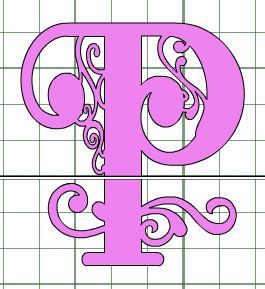
Once you've cut and weeded your image this is what you'll be left with.
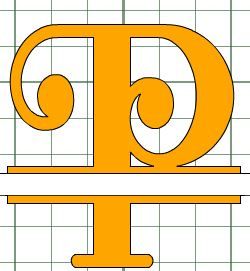
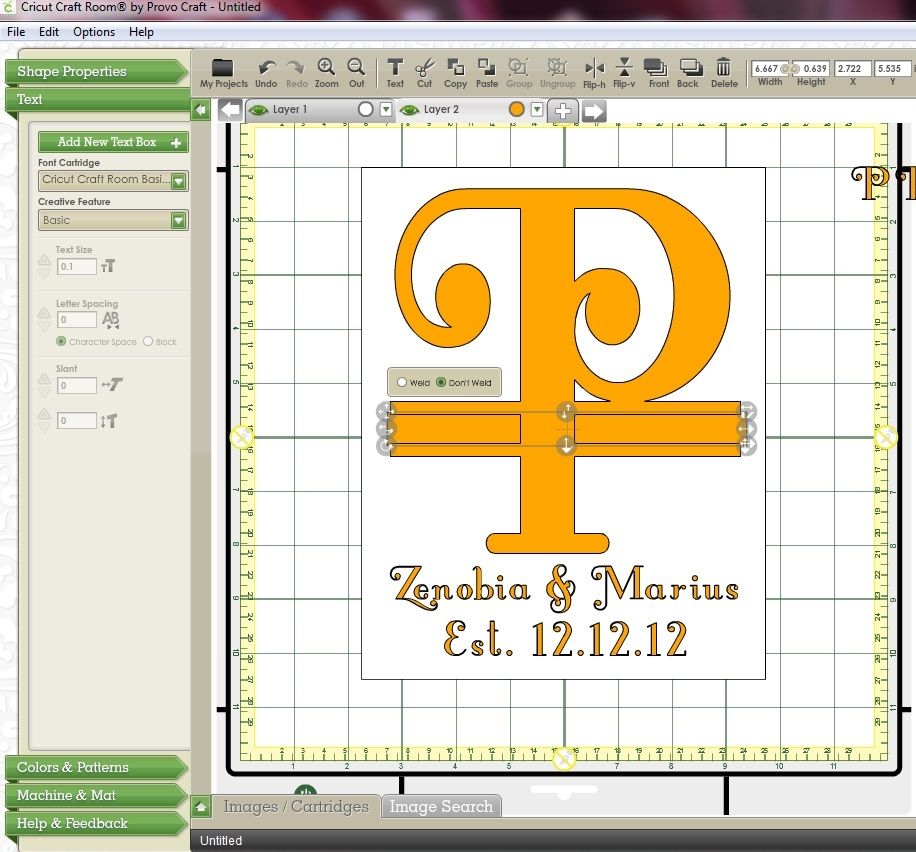
Below I have moved the surname over so that you can see that it will fit in the gap created. I can still move the bottom part of the letter P down after I've cut it though.
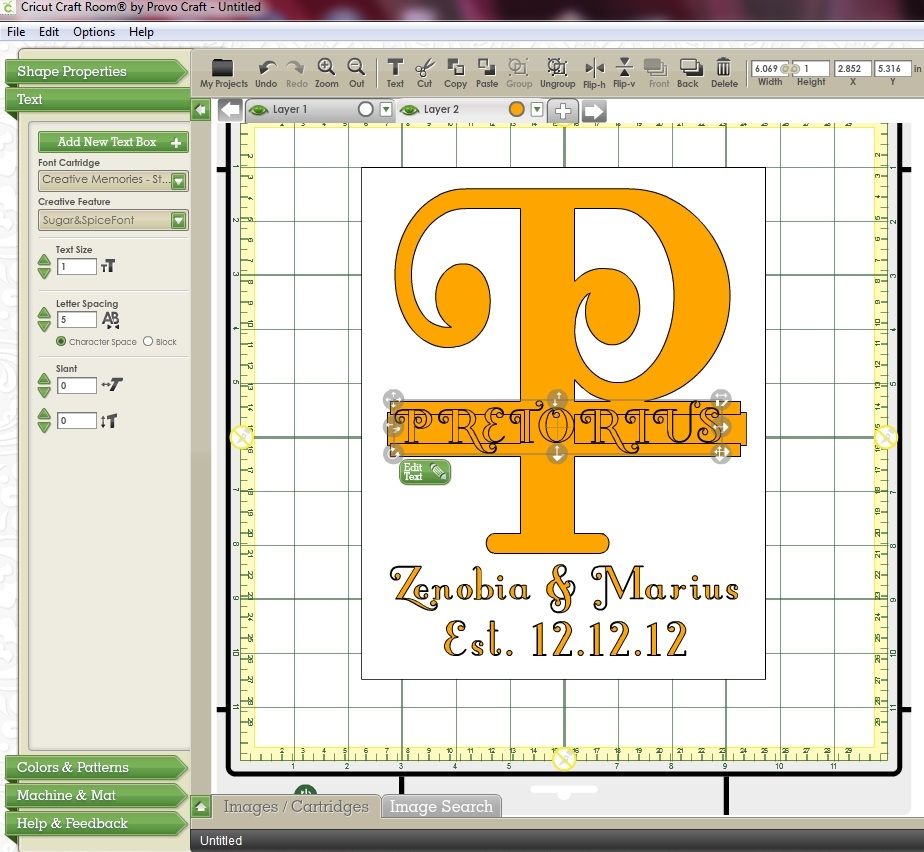
All you need to do now is move the surname below the other text, lay your vinyl on your mat and cut your project out!
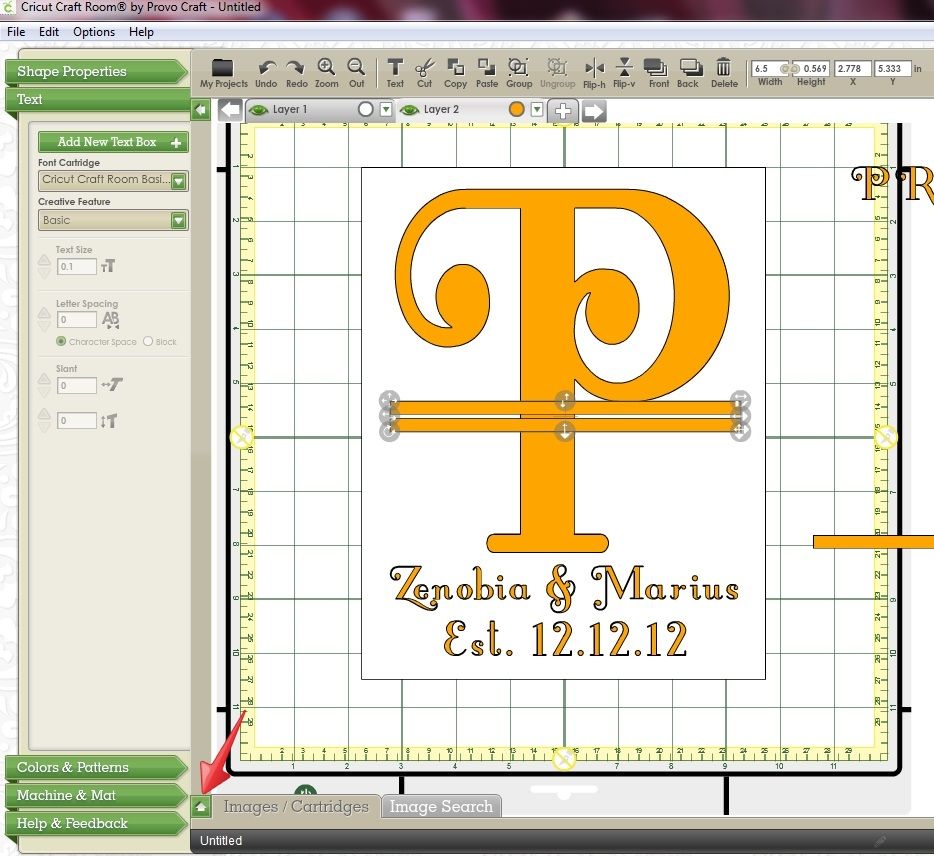
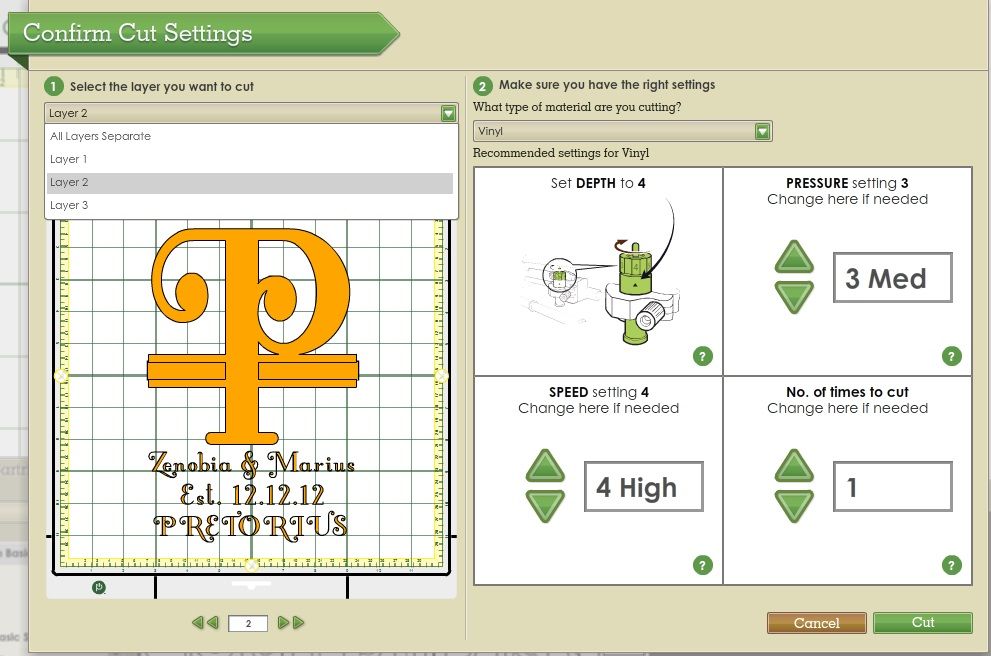
- At the cut settings screen select Layer 2 from the Layer menu and select Vinyl from the "What type of material are you cutting?" menu. Follow the instructions for setting the blade depth etc and cut your project out!
I've squashed all that info into a video for you too! Here it is.....
A little extra info.....
If you don't like the top and bottom bars on your monogram you can omit those. Just use one rectangle to split your monogram, making sure you select Don't Weld.
If you want your monogram to be a bit more fancy shmancy weld some "swirls" to your letter. Do a search for swirl in CCR and you'll find plenty. Close To My Heart - Art Philosophy has some good ones!
Have fun with it and feel free to post your Split letter monogram using the links below.
Narelle, you do such a great job explain things, it makes them seem so simple. I wish I could bottle you up and put you in my craft room so I could uncork the bottle everytime I need help...lol. Great job!!!! Your the best!!
ReplyDeleteThis is awesome!!! I am just beginning to use CCR...can't wait to look at all of your tutorials!
ReplyDeleteHugs,
Lynn
Thank you!! This tutorial is just perfect! My sisters first anniversary is coming up and I wanted to do something like this for her! Great tutorial.
ReplyDeleteAlicia
Nyssagarcia AT hotmail DOT com
This is awesome. I will have to try this for our 45th anniversary this Sept.
ReplyDeleteThank you so much Narelle for the tutorial! I am finally going to try this. I have been admiring these for so long. I can't wait to give it a whirl! Thank you again for sharing your knowledge with all of us!
ReplyDeleteNarelle this is awesome. I've been wanting to try this for a long time and wasn't sure how to go about doing it. Thank you so much for the video tutorial. I do better when I can see things done.
ReplyDeleteCindyLouScrappinWho
Very Cool!!!! gonna have to try this one :))
ReplyDelete--Robin
Thank you so much Narelle, I was wanting to make one of these for the longest time. I just needed some directions and the way you explain it things is great.
ReplyDeleteAuntie Dene
Oh mercy - as always, you do the most wonderful things. I'd like to think I can do this myself, however, I will need to go step by step when I try .... OH CRUMB.... do I need my password!!?!!
ReplyDeleteThanks for the great instructions on how to do this. I've wanted to do this for gifts but didn't think I was doing it right.
ReplyDeletesherri_braun@hotmail.com
I've been wanting to try this after seeing so many beautiful monograms. Thank you so much for tutorial.
ReplyDeleteThanks for the tutorial. I did one of these as a Christmas gift, but I actually hand cut the letter in half and placed two strips separately for the rectangle. Then of course I had to line the names up by sight. Now I can actually make a more professional looking split monogram! You definitely have a knack for making things seem so much easier.
ReplyDeleteThanks Narelle! Once again you have helped me use CCR. What would we do without you?
ReplyDeleteLove the tutorial. I am always "fearfull" of CCR but thanks to watching you I've learned alot and feel a little better. What a perfect project great job. Thanks for explaining.
ReplyDeleteTerri
Great tutorial! Thanks so much for the instructions. I have been wanting to make one of these for a long time.
ReplyDeleteLoved the video and tutorial! These are just beautiful projects Narelle. I can't wait to try one out!
ReplyDeleteColleen
I love the split letter idea I have to try it. Thanks\whlr_mryatyahoodotcom
ReplyDeleteThank you for this tutorial. I have seen these letters everywhere, but didn't have a clue as to how to do this.
ReplyDeleteYou know I really love this. It looks so elegant and such a great way to personalize a gift "second best friends" and other special people :)
ReplyDeleteVery cool! Thanks for the tutorial. I am definitely going to be trying this. It looks so elegant. Thanks for taking the time to share and thanks for the chance to win! Hope you enjoyed NSD!!!!
ReplyDeletegaudet5 at rogers dot com
I love that your tutorials are so detailed. Love this project and thanks for being so clear with your directions.
ReplyDeleteI've really been meaning to make one of these. Great tutorial! Thanks for the chance to win!
ReplyDeleteI'm so happy you did this tutorial because even though I have used my credits to purchase digitals I haven't gotten up the nerve to try out CCR. I think it's time to get my feet wet!
ReplyDeleteAwesome DETAILED tutorial. Thank you for sharing your expertise. They will love the gift!
ReplyDeleteI am so glad that I found your blog became a follower, love to learn more about CCR thanks the tutorial was great
ReplyDeleteupnurse at aol dot com
Fabulous instructions, Narelle, as always! I will do this for my daughter's 25th wedding anniversary in June. Many thanks for your great step-by-step help...
ReplyDeleteGreat project! Your tutorial is easy to follow, Thank you!!
ReplyDeleteNo wonder you laughed at my CCR question earlier this week! You are just too, too smart. Thank you for the wonderful tutorial.
ReplyDeleteOh My! After this I may have to get into CCR! You are an enabler! Great tut. Thank you!!!
ReplyDeletemjcburnatyahoodotcom
Love Your Project!
ReplyDeleteI'm sure your friend will love it too!!
Thanks for the detailed instructions!
You make me want to try it!
anethindes at yahoo dot com
What a wonderful tutorial! TFS. I have been wanting to try making one of these but vinyl intimidates me some. Time to put on my big girl panties and give it a go.
ReplyDeleteD- dmcardmaker (AOL)
http://designsbydragonfly.blogspot.com
Dragonfly50 (Cricut MB)
already anemail and google follower
What an awesome Tuturial Narelle, My Daughter is getting Married later this yr and I have to make her one of these. I havent gotten into the Craft room yet but plan to use it a bit more down the road. Im now following via email. Thanks!
ReplyDeleteWonderful tutorial Narelle! I've never thought about a project like this and will have to tuck it away for that next "special" anniversary. I'm sure your friend with adore this gift!
ReplyDeleteI am geting ready to try this RIGHT NOW! Cross your fingers that I can do it!! Thank you for doing this!!
ReplyDeleteThis is a great tutorial. I'm glad that you used CCR. I'm trying to learn to use it. I think you probably have lots more CCr tutorials. Thanks in advance.
ReplyDeletestuff@gt.rr.com
I followed your tutorial. It was so easy to do. I have never done anything like this before. Here is a ink to my sample that I will make for my nephew's wedding.
ReplyDeletehttp://grannyannesgreetings.blogspot.com/
Narelle, I have been wanting to do this for my kids and their spouses.
ReplyDeleteNow all I to do is follow your directions!! YEAH!!
Thanks so much for sharing. I am going to try this and hopefully I will do a good job, cross my finger!
ReplyDeleteNarelle, I can't wait to try this. As a Realtor, I am always looking for unique things that I can make for clients when they purchase a home. This is awesome! I am going to try one this week.
ReplyDeleteFantastic directions! I just found your blog after Mania and have been so impressed by everything you share. Thank you.
ReplyDeleteNever saw this before but it looks great!
ReplyDeleteJayne Evans
Lacey, NJ Facebook
This is wonderful. I was going to pay someone $50 to do two of these (similar) but the deal seems to have fallen thru. Your tutorial came just in time. I still have time to try and learn how to do this myself. Perfect timing on your part. Thank you so much for sharin.
ReplyDeleteDonna
I've been wondering how this could be done on my Cricut!!! What a GREAT tutorial you've given us! It's so detailed and easy to follow. Thank you! I will be trying this for my son and his wife this week. Oh and maybe one for my new little grandson's room! The ideas are swirling through my head now! I am also following your blog now!
ReplyDeleteAngela
Wonderful tutorial, Narelle. I love your use of the "unwelded" rectangle - that is so clever! Lovely gift and fabulous tutorial!!!
ReplyDeleteSuper tutorial, and I am going to give it a go for my daughter's anniversary in August. I'm going to make it sooner so I don't procrastinate as this is sooooo awesome!! I watched a couple episodes of Kath and Kim when I was over there and loved it!
ReplyDeleteThis is amazing, thanks! I'm going to make 2 of these asap, I've got 2 weddings to go to this summer and these would be fantastic wedding gifts! Thanks again!
ReplyDeleteThanks for the tutorial, I have wanted to try this!
ReplyDeleteLoved your tutorial, it was so detailed and easy to follow! Love your blogs and I just became a follower! Thanks so much!!!!
ReplyDeletedebmac
I loved the tutorial! You make it so easy to do, thanks.
ReplyDeletebedard01240@gmail.com
This is an awesome tutorial. I love it. I have just the project to try it on!
ReplyDeleteKatie Temple
krtemple99@aol.com
thank you thank you thank you, I've been wanting to do one of these and didn't have a clue. You described it wonderfully.
ReplyDeleteThank you for sharing an awesome tutorial.
ReplyDeleteJanis LU
I just came across this tutorial through the Cricut Craft room website when I searched the site for monogram. I always thought that there was a "font" for the split letters. I didn't realize I could have been doing it myself all this time. Thank you for the awesome tutorial.
ReplyDelete