There are two ways to type text using CCR. You can drag each letter from the keypad to the mat, or the better way is to use a Text Box. And that's what I'll be showing you today.
We'll be creating a welded title and a matching welded shadow.
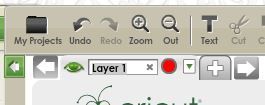
I have opened CCR and created two mat layers. To do that click on the + button next to the Layer 1 tab.
Because we won't be needing the keypad we can close the Drawer giving us a full view of the mat.
- Click the arrow to the left of the keypad
To make it easier to know which layer you're working on you can rename them if you wish. To do that:
- Double click on the Layer 1 tab to highlight the layer name.
- Delete the Layer 1 text and type in a new name. Press Enter.
- Repeat for the second layer.
You may also wish to change the Preview colour of your mat layers. To do that:
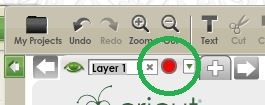
- Click on the coloured circle next to the layer name.
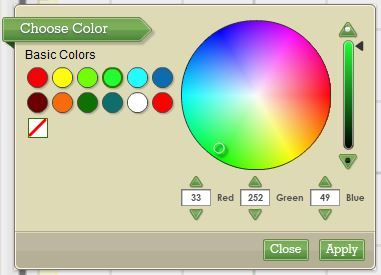
- Select a new colour from the palette then press the Apply button.
- Repeat for the other layer.
Now we'll create our top layer.
- Click on the first layer to make that mat active.
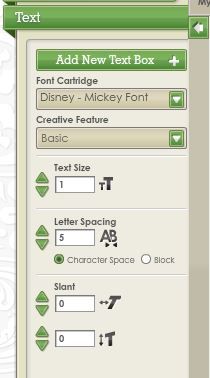
- Click the Text menu, then click the Add New Text Box button
A text box will appear on your mat.
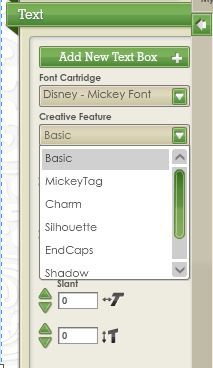
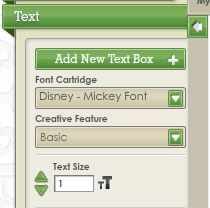
- Select your cart from the Font Cartridge drop down list. I'm using Mickey Font. (Make sure the font you select has a matching Shadow feature.)
- Make sure you have the base version of the font selected in the Creative Feature drop down box. In this case it's called Basic. (In some cases the Creative Feature names in CCR differ from those on the cartridge.)
- Select the size of your font by clicking on the green arrows or typing the new size in the box. (You can change the font size later if necessary). I selected a Font Size of 2.
- Click inside the Text Field box and type your word
As you type the word it will appear on your mat.
You can move the position of the word on your mat by clicking on the grey section of the text box and dragging it to its new position. You can do this before, during or after you have typed your word.
- Press the Done button to close the text box.
If you need to make changes to your text make sure the word is selected and press the Edit Text button.
Next we need to move the letters so they overlap.
- Make sure your word is still selected then press the green Letter Spacing down arrow. (Make sure you have Character Space selected - not Block.
- Continue clicking the down arrow until your letters have overlapped. (When your letters overlap you will notice that the black border around them disappears.)
Welding occurs as soon as your letters overlap.
Next we need to create the welded shadow.
- Click on the tab for your second layer to make that layer active.
- From the Text menu click the Add New Text Box button
- From the drop down Creative Feature box, select the Shadow option
- Make sure the Font Size is the same as the size you used in the Top Layer
- Click in the Text Field box and type your word again. As you're on the Shadow layer it should show up in a different colour. Click the Done button.
To make it easier to manipulate and weld the shadow move the shadow layer behind the first layer. To do that:
Click on the grey area of the tab for the second layer and drag it to the left. As you're dragging the tab you will see these icons.
Once the Layer 2 tab is over the layer 1 tab release the mouse. The shadow layer will now appear under the top layer.
- Click somewhere on the orange Shadow and using the top left handle, move the whole word so that the first letter sits neatly behind the first letter of the top layer
Now you're ready to weld the shadows letters together. However, in this case if you change the Letter Spacing setting, for some reason the top layer and shadow layer won't match up. Go ahead and try and you'll notice that the shadow doesn't quite fit the top layer.
In this case the difference isn't huge, but with some fonts it's quite noticeable. You'll see how the shadow of the I, N and the G don't match up well and need to drop down slightly.
We need to create the welded shadow in a different way.
- If you made any changes to your shadow, click the Undo button until you have it back to its original version. (Or delete it and recreate it.)
- Highlight the shadow again then click the Ungroup button on the Toolbar.
Now each of the shadow letters is an individual object and can be moved anywhere.
- Click anywhere on the mat to deselect the word.
- Click on the orange P and using the horizontal move handle move the letter to the left until it fits neatly under the yellow P. If necessary use the vertical move handle to move it down.
You'll notice that the Weld/Don't Weld box has appeared. That's because the S & the P are now individual objects. As soon as they overlap the Weld box will appear. You don't need to change this option so just leave it as it is.
- Next click somewhere on the orange R and move it over to the left using the horizontal move handle.
- Repeat for the remaining letters.
When you get to the I, N and the G you may find that you need to drop them down slightly to get the to align correctly.
Now that you have the shadows letters all aligned you can go back and group them.
- Click on the yellow layer and move the word down to sit somewhere below the orange layer.
- Drag a selection box around the shadow layer so all the letters are selected.
- Click the Group icon from the Toolbar.
Your shadow word is now one object again and you can click anywhere on it to move it around the mat.
Notes:
You aren't limited to whole numbers in the Letter Spacing box. You can type any number (eg. 5.3) to get your spacing just right.
It's not necessary to use preview colours. I think it just makes it easier to see your outlines.
It's also not necessary to use two layers (mats). You can leave the preview colours off and create both your layers on one mat.
Have fun creating your welded shadowed titles!






1 comment:
Thanks!
Post a Comment