Showing posts with label Shadow. Show all posts

Wednesday, February 3, 2021

Easy Text offsets in Inkscape V1.0

Back in June of 2020 (time flies...) I recorded a video demonstrating how easy it is to create offset shadows in Inkscape. 

Below you'll find screenshots of the process.  I hope this is helpful for those of you who don't like or have trouble following videos.  You can download a printable PDF from here: http://u.pc.cd/4nG


Congratulations! You’ve created your offset!


(You can select your original text and move it out of the way if you find that easier.) 


Your SVG is now ready to upload to any design program that uses SVG’s.

(Eg. Cricut Design Space, Silhouette Studio, ScanNCut Canvas)


Happy crafting!  ♥


Friday, November 8, 2013

CRICUT - CCR - Making your own font shadow


Recently a member from one of the Facebook groups I belong to was trying to make a shadow for one of the fonts on the Extreme Fonts cartridge. Faith was using the letter S from the Little League font. That font does have a shadow but it was a bit too chunky for what Faith was wanting.

Here's the letter with its shadow. First up, the offset size of the shadow was too wide... but more importantly Faith didn't want the black out effect.


She wanted something more like the shadow on this one...


One option was obviously to hand cut the extra bits away but I thought there had to be a better way. And I do love a challenge.... so I set to work and here's what I came up with...


Here's a side by side to compare...


So how did I do it? Well....

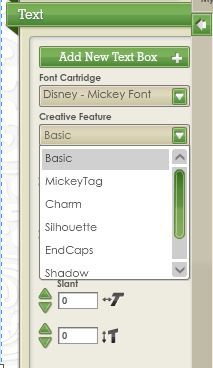
I looked at the shape of the letter and wondered whether I could find some shapes that I could weld together to make my own shadow. It's all just angles after all. My first thought was to use squares and triangle from the Cricut Craft Room Basics cartridge. But then I noticed these shapes from the Extreme Fonts cartridge that Faith was using... The best thing was that the angles on these shapes match exactly the angles on the letters...


By rotating, flipping and resizing the shapes I was able to come up with my shadow.

This picture shows all the shapes I used...


I used the top layer as a guide for where to place each shape. You can see the lines on the orange piece that are the edges of the shapes I used....


It took a bit of resizing and adjusting but it worked!

This won't work for every font. In fact I haven't tried it on any rounded font. But it should work for any square font. You just have to find the right shapes to use.

So where did I use this shape?


Right here... I used the Hide Contour feature to hide one side of the brace.

This shape would have been even more useful if it didn't have a point on the left and right!


And here's the different rotations of the wedge shaped piece. Use the Flip Horizontal and Flip Vertical buttons to rotate the shape.


The square shape is resized to both create the shadow and to fill any holes left from using the other shapes.

Things to remember...

Save regularly... There's a lot of shapes on this mat that you don't want to lose when CCR freezes.... because it will freeze....

As soon as you start welding objects in CCR your chance getting a Not Responding error skyrockets.


At that point, you have no option but to close CCR and re-open it. (Which is why you need to save often... don't rely on the Auto Save feature.)

To avoid all the Not Responding errors, I selected Don't Weld on each piece as I placed it. Once I had everything where I wanted it, then I selected Weld.

Once everything was welded I selected it all and Grouped it. This makes it so much easier when you're moving shapes around the mat.

However, if you go to Ungroup it (if you want to adjust any of the pieces) you will again get the Not Responding error. To avoid that, select the image, click the Edit Group button then go back and unweld the shapes.  See.... it really is the welding that's the problem here!!!!


At this point you can actually adjust/move the individual pieces around. You don't have to Ungroup them to do that.... But, if you do want to ungroup....

Once you've unwelded everything press the Exit button.

You can then go ahead and click the Ungroup button and you shouldn't get a Not Responding error.

One last thing to remember.... When you go to resize your finished letter make sure you resize both the orginal letter and the shadow at the same time. That way they'll stay in proportion to each other.

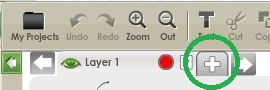
The easiest way to do that is to use Ctrl A to select everything on both layers. (First make sure the Show/Hide layer icon on the tabs is green..... that's the button that looks like an eye....)

Then use the bottom right arrow to resize both layers at the same time.

I have to say, this process would be so unnecessary if CCR had an automatic offset feature.... (like every other design program out there). Then we could apply a shadow (even multiple shadows) to every font and image in the Cricut library.

I think that was everything I wanted to cover.

Hope this is useful to you at some point!

(And no.... I won't do the rest of the alphabet!) Smiley


Thursday, May 16, 2013

CRICUT - CCR - Welded titles and shadows

This is an updated version of my original post from the Cricut Craft Room Blog.


There are two ways to type text using CCR. You can drag each letter from the keypad to the mat, or the better way is to use a Text Box. And that's what I'll be showing you today.

We'll be creating a welded title and a matching welded shadow.


I have opened CCR and created two mat layers. To do that click on the + button next to the Layer 1 tab.


Because we won't be needing the keypad we can close the Drawer giving us a full view of the mat.
  • Click the arrow to the left of the keypad

You'll now have two layers in your design. The active mat layer's tab will be highlighted in light grey.

To make it easier to know which layer you're working on you can rename them if you wish. To do that:
  • Double click on the Layer 1 tab to highlight the layer name.

  • Delete the Layer 1 text and type in a new name. Press Enter.
  • Repeat for the second layer.

You may also wish to change the Preview colour of your mat layers. To do that:

  • Click on the coloured circle next to the layer name.


  • Select a new colour from the palette then press the Apply button.

  • Repeat for the other layer.

Now we'll create our top layer.
  • Click on the first layer to make that mat active.
  • Click the Text menu, then click the Add New Text Box button

A text box will appear on your mat. 

  • Select your cart from the Font Cartridge drop down list. I'm using Mickey Font. (Make sure the font you select has a matching Shadow feature.)


  • Make sure you have the base version of the font selected in the Creative Feature drop down box. In this case it's called Basic. (In some cases the Creative Feature names in CCR differ from those on the cartridge.)


  • Select the size of your font by clicking on the green arrows or typing the new size in the box. (You can change the font size later if necessary). I selected a Font Size of 2.


  • Click inside the Text Field box and type your word

As you type the word it will appear on your mat.

You can move the position of the word on your mat by clicking on the grey section of the text box and dragging it to its new position. You can do this before, during or after you have typed your word.

  • Press the Done button to close the text box.

If you need to make changes to your text make sure the word is selected and press the Edit Text button.

Next we need to move the letters so they overlap.
  • Make sure your word is still selected then press the green Letter Spacing down arrow. (Make sure you have Character Space selected - not Block.

  • Continue clicking the down arrow until your letters have overlapped. (When your letters overlap you will notice that the black border around them disappears.) 
 
Welding occurs as soon as your letters overlap. 


Next we need to create the welded shadow.
  • Click on the tab for your second layer to make that layer active.

  • From the Text menu click the Add New Text Box button
  • From the drop down Creative Feature box, select the Shadow option
 
  • Make sure the Font Size is the same as the size you used in the Top Layer
 
  • Click in the Text Field box and type your word again. As you're on the Shadow layer it should show up in a different colour. Click the Done button.
You'll notice that the shadow text will appear on top of the first layer's text. 

To make it easier to manipulate and weld the shadow move the shadow layer behind the first layer. To do that:

Click on the grey area of the tab for the second layer and drag it to the left. As you're dragging the tab you will see these icons.


Once the Layer 2 tab is over the layer 1 tab release the mouse. The shadow layer will now appear under the top layer. 


  • Click somewhere on the orange Shadow and using the top left handle, move the whole word so that the first letter sits neatly behind the first letter of the top layer
Now you're ready to weld the shadows letters together. However, in this case if you change the Letter Spacing setting, for some reason the top layer and shadow layer won't match up. Go ahead and try and you'll notice that the shadow doesn't quite fit the top layer. 


In this case the difference isn't huge, but with some fonts it's quite noticeable. You'll see how the shadow of the I, N and the G don't match up well and need to drop down slightly.

We need to create the welded shadow in a different way. 
  • If you made any changes to your shadow, click the Undo button until you have it back to its original version. (Or delete it and recreate it.)
  • Highlight the shadow again then click the Ungroup button on the Toolbar.

 
Now each of the shadow letters is an individual object and can be moved anywhere.
  • Click anywhere on the mat to deselect the word.
  • Click on the orange P and using the horizontal move handle move the letter to the left until it fits neatly under the yellow P. If necessary use the vertical move handle to move it down. 

You'll notice that the Weld/Don't Weld box has appeared. That's because the S & the P are now individual objects. As soon as they overlap the Weld box will appear. You don't need to change this option so just leave it as it is.
  • Next click somewhere on the orange R and move it over to the left using the horizontal move handle.
  • Repeat for the remaining letters. 

When you get to the I, N and the G you may find that you need to drop them down slightly to get the to align correctly.


Now that you have the shadows letters all aligned you can go back and group them.
  • Click on the yellow layer and move the word down to sit somewhere below the orange layer.
  • Drag a selection box around the shadow layer so all the letters are selected.
  • Click the Group icon from the Toolbar.

Your shadow word is now one object again and you can click anywhere on it to move it around the mat.

Notes: 
You aren't limited to whole numbers in the Letter Spacing box. You can type any number (eg. 5.3) to get your spacing just right.
It's not necessary to use preview colours. I think it just makes it easier to see your outlines. 

It's also not necessary to use two layers (mats). You can leave the preview colours off and create both your layers on one mat.

Have fun creating your welded shadowed titles!
Related Posts Plugin for WordPress, Blogger...