
Here's an article I recently wrote about Welding in Design Space. Hope you find it helpful.

Q: What is Weld?
A: Welding is used to join text or images together so they cut as one. For example:
These two samples of text are unwelded. There is space between all the letters and that’s how they will cut out.


The text below is welded. The letters have been moved closer together so they touch and then weld has been selected from the Layers panel. How you see it is how it will cut. (Note that some letters do still have spaces between them, but that’s because they look better that way.)
Script text usually looks best when it’s welded.

Non script text generally looks better unwelded.

But welding isn’t just for fonts. You can weld images together too.
Say I want to use this image to create a title across a scrapbook page.

I just duplicate the image the number of times I want on my layout, position them how I want them…

... then making sure they are touching, select them all and Weld.

Now they’ll cut as one object instead of 5 separate objects.
Another example would be if you want to make a shaped card.
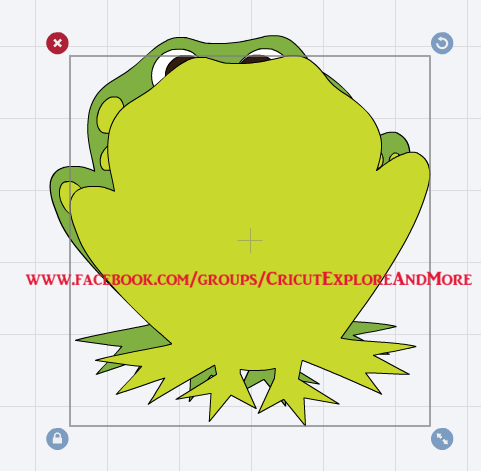
Let’s say you have this cute frog image from the Live Simply Cricut cartridge and you’d like to create a card that shape...

Start by adding that shape to your Design Space canvas.
|  |
Using the Edit bar, change the size to the height and/or width you want your finished card to be.
|  |
With the image selected go to the Layers panel and select Ungroup.
|  |
Click on the bottom frog layer then select Duplicate.
|  |
A copy of the bottom layer will appear.
|  |
Click on the “eye” next to the three middle layers to hide them.
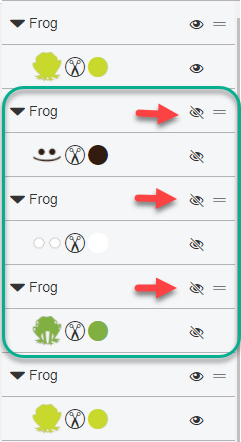 |
Now only the two solid layers will be showing.
 |
Decide whether you want a vertical folding card or a horizontal folding card. For this tutorial I’ll be making it a top folding card.
Select the top frog
|  |
From the Edit toolbar click the Flip button then select Flip Vertical. The image will be flipped upside down.
 |  |
To ensure that the two images are symmetrical we also need to flip the top image horizontally.
With the image still selected click the Mirror Horizontal button.
 |  |
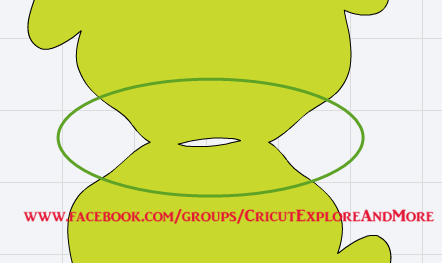
Now drag the top frog up and position it so the two heads are touching.
It’s up to you how much you want these two pieces to overlap.
|  |
Select both frogs then click on the Align menu from the toolbar and select Align Left.
 |  |
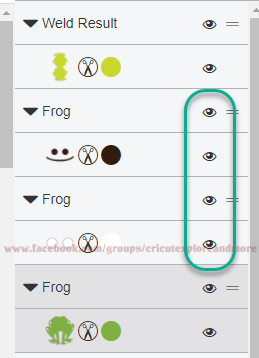
Now, with both frogs still selected, click the Weld button at the bottom of the Layers Panel.
|
You can see that the two images have been combined into one.
 |
If you feel that the join isn’t going to be strong enough when the card is folded, select Undo (to reverse the weld process), move the two images slightly closer together then Weld again.

(Make sure that both images are still Aligned left otherwise your edges won’t line up.)
|  |
Go back to the Layers panel and click on the closed eyes to show those hidden layers.
|  |
Those layers will be positioned beneath the welded layer.
Select the welded layer then click on the Arrange menu and select Move to Back
|  |
You can now move the top layers into position on top of the welded layer to see your finished card.
|  |
Here it is as a horizontal card.

You can also weld text onto and inside images.

Notes about welding
Welding cannot be undone once you have closed your Design Space file. You can use the Undo button to reverse the welding process even after saving your project. But if you weld, save and close that project you will not be able to go back and unweld. It’s always a good idea to duplicate any images/text before you weld.
Happy crafting! ♥


